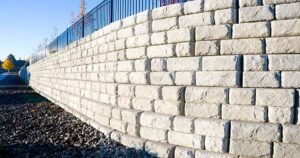
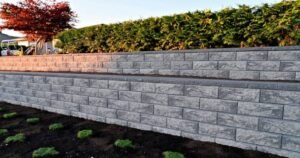
Building a garden retaining wall is one of the most rewarding projects you can take on. You’ll get to enjoy the results of your labor for years to come. In addition, you will have the satisfaction of knowing that you have made a lovely, useful addition to your yard. If you’re planning on building a retaining wall in your garden,
Here are 9 steps to building a great-looking garden retaining wall:
1. Plan A Location
The first step in building a great-looking garden retaining wall is to make sure you have a suitable location for it. Most retaining walls are built on the side of the property and are not visible from the street. This makes them suitable for privacy and security reasons. The most appropriate place for your garden wall will be close to your house, but not too close. If you have a front yard, it should be about 4 feet from the house.
The next step is to decide what kind of material you want to use for your garden retaining wall. There are many different options available when it comes to building a retaining wall, and they range from cement blocks to wooden posts with metal braces between them.
2. Level The Site, And Clear Away All Foliage And Roots
This step is critical because it ensures that the wall will be level when it is constructed. If you don’t level the site, then it would be difficult to construct your garden wall correctly.
Use a spirit level and a straightedge to level the site. Mark off each foot of the retaining wall with stakes. Then dig down 3 inches at each stake location and fill with concrete. Also, clear away all foliage and roots from the location to ensure proper construction.
3. Anchor The Back Of Your Retaining Wall With A Geogrid
Building a retaining wall is a smart way to add privacy and security to your yard. You can use a geogrid to secure the retaining wall’s back. Geogrids are made with thousands of tiny steel wires that hold together in an interlocking pattern. In addition, they are usually sold in rolls that come with anchors on them so you can easily install them on top of existing foundations.
4. Install The Post Anchors
Once you have determined where the wall is designed to be located, it is time to get the posts into place. The first step in building a retaining wall is to drill holes into the ground and insert the post anchors. These are metal stakes that are designed to hold up the weight of your fence or wall as well as prevent it from sinking into the ground.
5. Add The First Course Of The Retaining Wall
The first step in building a concrete retaining wall is to build a concrete form, which provides the foundation for your wall. The thickness of a standard form is typically between 3/4 and 1 inch thick.
Once you’ve built your form, fill it with concrete and let it dry overnight. Once the concrete has been set, remove any remaining excess material with a wire brush or hand sander. Make sure you only remove the necessary amount of material so that no gaps appear in between the rocks.
6. Dry Lay The Second Course
Lay out the second course of stones so that it’s perpendicular to the first. This will ensure you have a straight wall, as well as make it easier to work with later on.
Set the stones into place using a mortar mix or concrete adhesive. Use a trowel to spread the mortar across each joint and then pop each stone into place before applying more mortar over the top of them.
Continue laying the second course until you’ve built up a wall with at least 2 feet of height, or until you reach your desired height for your garden wall.
7. Fill Behind The Wall Blocks With Gravel
After the concrete has been set and you have filled in the gaps, you will need to add gravel. The purpose of this is twofold:
The first is to keep the fill from settling and causing cracks in your retaining wall. You can use a trowel or shovel to push the gravel into place.
The second purpose is that it will help reduce the weight of your retaining wall blocks. If you have used a lot of rocks and not enough sand, then you may need more gravel than usual so that there is enough weight for each block.
8. Cement Each Block In Place With A Trowel And Mortar Mix
To achieve the most effective results, apply the cement to both sides of each block before placing it on its foundation. Then, after placing each block on its foundation, fill any spaces between the blocks with a trowel until they are flush with their surroundings. If you have used a mortar mix instead of cement, be sure to fill any cracks or holes left by the cement with additional mortar.
9. Finish Off The Retaining Wall With Accessories
Once you’re done building your wall, use caps or accessories to finish off the retaining wall. These can be decorative and functional, depending on what you’re trying to achieve.
For example, if you want a more natural look that blends into the landscape, use a cap made of stones or bricks. If you want a more formal look, use a decorative cap made of cement.
Once you follow these 9 easy steps you will be able to build a garden retaining wall with ease!
Are you searching for a reputable retaining wall contractor in Clarence, NY?
Soil & Seed Landscaping can help you to resolve all your wall problems with our team of experts who can tackle any wall job.


