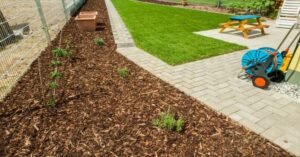
There are plenty of reasons to add mulch to your garden beds. Not only do they help you in terms of aesthetic beauty, but a layer of mulch can significantly benefit your plants and also the soil – only if you know how to apply it correctly.
For some, mulching can seem like a simple exercise – shovel, dump, spread, and repeat. But in reality, a lot more goes into it if you want to experience the true benefits of mulch.
Ahead, we have detailed the steps on how to lay your mulch the right way. You can also avoid the hassle, and directly hire professional mulch installation service Clarence to help you complete this tiresome process with a hitch.
Firstly, the tools you’ll need:
- Shovel or pitchfork: If you’ve had chunks of mulch delivered to your home, you will need a shovel or pitchfork to place the mulch into the wheelbarrow.
- Rake: The ideal rake would be a bow rake – which you can use for spreading the mulch. Its shorter tines are sturdy and rigid, which will help in breaking up and spreading the material. You can also use a handy leaf rake.
- Wheelbarrow: For carrying your mulch easily to different parts of your lawn.
- Gloves: Use them when you are spreading your mulch around plants and hard-to-reach places.
Important Read: Garden Maintenance and Mulch Installation in Clarence, NY
Mulching Details
Before you start mulching, you need to consider the right type of mulch for your landscape. There are plenty of options to choose from. But organic mulches are always better than inorganic mulches.
Organic mulches include straw, wood chips, grass clippings, chopped leaves, and compost. Examples of inorganic mulches include plastic, fabric, or rubber.
Organic mulches are great for water retention, adding nutrients to the soil, and protecting plant roots. However, they are not good for weeds or pest control.
You can use inorganic mulch for decorative purposes, and it also aids in preventing weed germination, helps retain moisture, and regulates root temperature.
How much mulch will you need?
For this, you need to start by measuring the square footage of the area that you want to mulch. Don’t miss out on the flowerbeds. Then, multiply the width and length of the area to cover.
Then, you need to determine how deep the mulch should be going. For this, you can discuss with professional mulch installation service Clarence and get an idea of the inches.
Multiply the square footage of your area that is to be mulched by the number of inches of mulch you want to apply. Then divide that number by 12, as a cubic foot of mulch will cover 12 square feet with about 1 inch of mulch.
Remember you want to give space to the mulched areas to breathe. So don’t overdo it.
Steps To Apply Mulch In Your Lawn
Step 1: Clean Out The Beds
Start your mulching by removing all the dried-up leaves, debris, sticks, and old mulch from previous years. Also you must take your time to clean up the edging along the flower beds. Use a spade to create that defined line between your bed and lawn.
Step 2: Water Your Beds
The next step is to wet down dry beds. To prevent weeds from germinating owing to the moisture of the mulch, you can go extra cautious and add a pre-emergent herbicide to prevent weeds from germinating.
Step 3: Remove The Weeds
One of the significant benefits of mulching is to prevent weeds from growing. So, pulling out or removing the weeds will help you get a headstart. You can use a garden spade to remove them.
Step 4: Spread The Mulch
Shovel small piles of mulch onto the lawn and the flower beds. You will need the wheelbarrow here to transport the mulch easily to different areas of the lawn.
Use your hands to spread the mulch evenly.
Don’t dump too much mulch in one area. This will suffocate the plant roots
Step 5: Water After Mulching
Though this is an optional step, watering the mulch after spreading it will help it settle better into place.
Need Someone To Mulch Your Lawn?
You can book experienced landscaping services and mulch installation service Clarence from Soil & Seed Landscaping. Call us to get your free quotation today!


