Laying down pavers is one of the quickest and easiest ways to install patio flooring. Don’t take us wrong – brick, poured concrete slabs, and natural stone patios also do have their advantages.
But patio-pavers are so simple and fast to work with that you can do the entire job by yourself. In just a few days, you will have a charming patio for outdoor entertaining or just for enjoying your outdoor space in comfort.
Want to know the easy steps for paver patio installation Clarence NY? Scroll down!
What We Will Cover In This Guide
- Tools
- Materials
- Paver Patio Installation Guide
- Preparing The Site
- Placing The Foundation
- Installing Pavers
- Installing Edging
- Adding And Compacting Joint Sand
- Cleaning And Sealing
Tools For Paver Installation
| ✅ Shovel |
| ✅Tape Measure |
| ✅Tamper or Plate Compactor |
| ✅Landscaping Rake |
| ✅Hammer |
| ✅Rubber Mallet |
| ✅Circular Saw with Concrete Blade |
| ✅Wheelbarrow |
| ✅Garden Hose |
| ✅Push Broom |
| ✅Level |
| ✅String Line |
| ✅Speed Square |
| ✅Stakes |
| ✅Eye Protection |
| ✅Hearing Protection |
Materials For Paver Installation
| ✅Pavers |
| ✅Class II Road Base |
| ✅Bedding Sand |
| ✅Geotextile Fabric |
| ✅Joint Sand |
| ✅Concrete |
| ✅Sealer |
Paver Patio Installation Guide
- Preparing The Site
Pre-Demolition
Done gathering the tools and materials you need for the patio project? Now, it’s time to prepare the site where you plan to install the pavers. It’s always a wise idea to call 811 before you dig. This is to make sure you don’t accidentally damage buried water, gas, or electrical lines.
Demolition & Excavation
Remove any grass or existing hardscape surfaces from the area where you want to install the pavers. But make sure not to hit any utility lines.
- For a pedestrian area, excavate 8 ½ inches from the end of the graded slope.
- For vehicular areas (driveways and garage), excavate 9 ½ inches from the end of the graded slope.
- For a commercial vehicle or an RV area, excavate 11 ½ inches from the end of the graded slope.
Grade The Area
After you are done removing the hardscape, grade the area using a level. You must grade at a 2% slope to ensure proper water drainage away from your property.
For the first 4 feet away from the house, the slope needs to be ¼ inch of fall per foot, and 1/8 inch of fall per foot thereafter.
Compact The Sub Base
To get a long-lasting and structurally sound patio paver installation, you need a strong sub-base. So, in the next step, compact the soil or gravel of the area where your pavers will go. Use a tamper or plate compactor for this.
Install The Geo-Textile Fabric
Using geotextile fabric in the paver is strongly recommended. Especially for areas with clay soil.
To install the geo-textile fabric, roll out the material and cut it to match the shape of the paver. This will shield your foundation from the underlying soil.
- Placing The Foundation
Prepare Road Base
Now that your land has been properly prepped, it’s time to lay the foundation for the pavers. Pour the Class II Road base in two inches increments. Compact them twice with the plate compactor before pouring the next two inches.
Pour And Screed The Sand
Next, place the screeching guides (1” PVC pipes) on top of the road base. Pour sharp angled bedding sand all over the base.
Then, use your rake to level the sand roughly. Follow this up by screeding the sand with a 2×4 to ensure an even 1-inch depth. Make sure the screeded sand is level before moving on.
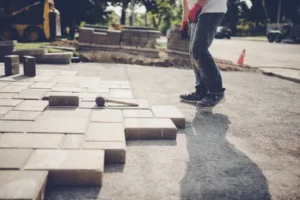
- Installing Pavers
Finally, it’s time to install the pavers. Lay down your desired paver pattern before cutting any border stones. Make sure to lay them straight down.
Cut The Border Stones
After establishing the basic field of pavers, mark the border stones. Safely remove and wet saw them. Wear ear and eye protection while using a circular saw with a concrete blade.
Installing Edging
Trench The Border Stone Area
Trench the areas that lay against grass, asphalt, or dirt. The trench depth should reach the native soil. Also, it should extend the same width as your border stone.
Next, lay down the bond beam footings into the trench. Pour concrete over it and then set your newly cut border stones in place. Don’t forget to tamp them down. Remove any excess concrete from the outside edges of the paver.
Adding And Compacting Joint Sand
Next, pour joint or polymeric sand over the top of the paved area. The sand should reach about 1/8 inch above the top of the pavers. Then, tamp the sand down.
Cleaning And Sealing
Use a broom or leaf blower to clean up excess sand before watering down the paved area. Next, adjust a hose nozzle to a soft shower and gently water the pavers.
After the area dries, apply the paver sealers using a spray applicator. Make sure to turn off the sprinklers and avoid moisture for the next 48 hours after sealing the pavers.
Enjoy Your Brand-New Gorgeous Pavers!
Congrats, our paver installation project is all done! Now, pull up a chair, pour a chill glass of lemonade, and admire your hard work.
Remember, if you are not a fan of heavy lifting and digging and paver laying, the team of Soil and Seed Landscaping is always ready to help! Our landscaping experts can help you choose the size and shape of paver that will fit your home and budget. We will get the work done quickly and thoroughly so you can enjoy your all-new patio at the earliest.
Contact us today for affordable paver installation Clarence NY services!